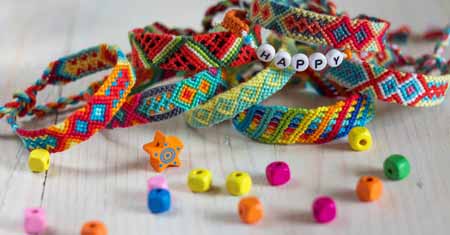
Bracelets and ankle bracelets are a fashion that will never disappear. Women and men alike enjoy wearing bracelets of various sizes, colors and textures. Make a simple triple row string bracelet from three strands of embroidery floss or pearl cotton. Choose your favorite color or make the bracelet multi-colored.
Things You’ll Need:

3 strands of embroidery floss or pearl cotton, 36-inches in length
Clipboard
Scissors
Instructions:
Step 1 – Match the ends of the three strands. Tie the three strands together with a knot approximately 2-inches from the end.
Step 2 – Clip the knot under the clip on a clipboard. Position the long strands so the hang past the bottom of the clipboard.
Step 3 – Separate the three strands. Work with the outer left strand to begin. Make an L shape from the strand and place it over the center strand.
Step 4 – Place the end of the L shaped strand under the middle strand and through the loop created by the L shape. Pull the end of the strand tight. A knot is formed. Continue to pull the knot until it is flush with the top end of the bracelet.
Step 5 – Continue using the same left hand strand and make an L shape over the right hand strand. Place the end of the L shape under the right hand strand and through the loop created by the L shape. Pull the end of the L shaped strand to create a knot. Slide the knot up the right hand strand until it is at the top end of the bracelet.
Step 6 – Place the left hand strand on the outside right of the three strands. Repeat Steps 3 through 6 until the bracelet is the desired length.
Step 7 – Tie a knot to secure the three strands together just below the last row of knots.
Step 8 – Cut the loose ends of the strands to within 2-inches of the knot.
Tip: Any type string will work to make this type of bracelet. Add additional width to the bracelet by adding more strands at the beginning. Following the same L shaped knotting instructions to create a banded bracelet.
Striped Ankle Bracelet Instructions
Striped ankle bracelets are making a comeback. Adults are adorning their ankles with striped bracelets made from embroidery thread or pearl cotton. These stylish bracelets are both easy and fun to make. Adjust the pattern by adding or subtracting rows to create the perfect fitting striped ankle bracelet.
Things You’ll Need:
6 different colors of embroidery floss or pearl cotton
Tape measure or yardstick
Scissors
Clipboard
Instructions:
Step 1 – Measure and cut six different colors of embroidery floss or pearl cotton into 36-inch lengths. Match the ends. Tie a knot in one end securing the six strands together. Place the knot approximately 3-inches from the end.
Step 2 – Clip the knot under the clip on a clipboard. Pull the long end of the embroidery floss or pearl cotton so it extends past the bottom of the clipboard.
Step 3 – Separate the strands so they are side-by-side.
Step 4 – Make an L shape with the outside left strand. Place the L shape over the second strand.
Step 5 – Insert the end of the L under the second strand and through the loop made by the L shape. Pull the end of the strand making the L tight. Slide the knot up the strand of floss until it is flush with the top of the clipboard.
Step 6 – Continue making L shapes over the remaining four strands using the same piece of embroidery floss or pearl cotton. A stripe of the first color is achieved. Place the strand along the right hand side of the grouping.
Step 7 – Repeat Steps 4 through 6 until the striped ankle bracelet is the desired length. Always begin each stripe with the outside left piece of embroidery floss or pearl cotton.

Step 8 – Tie a knot directly beneath the last stripe of color.
Step 9 – Remove the completed striped ankle bracelet from the clipboard. Cut the ends of the embroidery floss or pearl cotton approximately 2-inch from each knot.
Tip: Use a double square knot to attach the ankle bracelet. Make a striped bracelet or choker using the same instructions.
